How to Change Colors in Crochet in Middle of Row
If you're a crochet beginner and you're about to embark on a lovely big new blanket, you'll probably be worrying already about how to make effortless color changes that won't leave you with endless tails to sew in at the end of the project.
Well, stress no more as here is our guide to the best ways out there to change your yarn shade neatly and effectively without a loose end in sight.
1. Change colors at the end of a row
This is the easiest and most popular way of changing color, and is the perfect method if you're making an afghan or throw with blocks of color. At the end of your row, on the last stitch (whatever the type of stitch you are making) leave two loops on your hook and do not complete the final pull through with the original color. Instead, take your second color and, leaving a tail of around 6 inches, yarn over and pull through your last two loops using the second color.
This effectively joins the yarn without a knot. Now you can decide whether to lay the tails of the old and new yarns flat across your row and stitch over them as you go, or whether to sew in both ends securely later. Your decision should take into account the weight of yarn you are using - if it's something chunky, you may not be able to hide the tails without creating quite a lot of bulk. If you stitch over your tails, you only need to complete 6 to 8 stitches and then can snip off the remainder. There's a great tutorial on this method here.
2. Change colors in the middle of a row
Changing colors in mid-row could not be easier. Just get to the point where you need your color change, start the stitch (of whatever type) in your original color but, when you have two loops left on your hook, complete the final yarn over and pull through in your new color. If you are making a Fairisle or Intarsia crochet pattern, you may want to 'carry' your original color at the back of your work for another color change in just a few stitches. In that case, you can 'float' your yarn behind the work, making sure not to pull it too tight, just by carrying it along until the next stitch where it is needed. You can then carry your next color in turn, and create intricate patterns without needing to tie knots, snip ends and weave in tails, with nothing visible on the front of the work.

3. Change colors with a double knot
Although many crocheters faint away at the sight of a knot, it is an extremely secure way of joining a new yarn color, which may be appropriate if you are creating a baby blanket or throw which will need to be tossed in the washing machine from time to time. A knot is not going to unravel so is very safe and doesn't have to be obvious. If you are using a knot, mark the spot where you want the color change to come with a pin, then tie the yarns together, one on the exact spot and one above, easing them into the right position. Once they are adjusted and pulled tight, you can snip your ends off so there are no tails left and crochet along happily. This tutorial explains in detail.

4. Change colors without knots
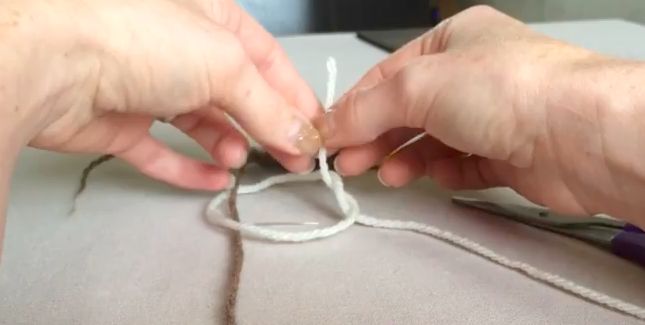
There is also a cunning way to join two different yarns without using a knot and without being left with long tails. Sounds like magic? It certainly looks like it. First create a large loop with the tail of one of the yarns, then loop the other yarn through the first with a similar big loop. Thread the tail of your first yarn through a tapestry needle and then put the needle into the same yarn at the intersection you want with the second yarn. Move the needle right through the centre of the yarn for a couple of inches. Remove the needle and unthread it, massage the yarn to reshape it, and snip off the excess yarn. Repeat the procedure on the other side, and you will have a perfect, seamless and tail-free join. Have a look at this tutorial for all the steps.

Don't forget to share this awesome list!
How to Change Colors in Crochet in Middle of Row
Source: https://diyeverywhere.com/2017/04/15/4-best-ways-to-change-colors-in-crochet-/
0 Response to "How to Change Colors in Crochet in Middle of Row"
Post a Comment